Getting my hands dirty with Opentrons
Table of contents
- Table of contents
- Background
- Installing their app
- Creating a protocol with the python sdk
- Testing our protocol
- Conclusion and outlooks
Background
If you ever entered a biotech lab (especially USP) in the last 10 years, you would know how important liquid handlers have grown lately. A liquid handler is basically a robotic arm that controls a pipette precisely and let you do all your tedious pipetting work automatically.
The first time I really encoutered a liquid handler, (and by “really encoutered” I mean got mad at it) was during my bachelor thesis roughly 5 years ago. I was working on the Numera autosampler by securecell at the TU of Vienna and we were using an ASX 7200 to put our samples to vials that would be processed by our analytical tools. At that time my young self basically thought “yeah that’s a robotic arm” and I was even a bit upset cause I couldn’t really hack it (or at least I had no idea how to).
However, while visiting labs I am applying into for a PhD :crossed_fingers: I often encoutered what the PI presented as an “open source” liquid handler. Being my nerdy selve, I had to dig a bit into opentrons.
From what I see it is indeed an opensource device (pricy obviously) that can let you create “protocols” in a python flavor.
Throughout this post I would tell my story with their api and apps without any device at hand.
Installing their app
As always, I am running in a linux based environment (ubuntu 24.0.4, KDE flavored), so I will focus on the linux installation here.
The install seems really straight forward, we can download a .appimage from opentrons website, simply double click on it, accept whatever it asks you and…… nothing (at least in my case).
Sooooo, I tried again through a terminal, assuming the .appImage is set as an executable if not you can simply chmod +x it, we can run the app using
1
./<yourapp>.AppImage
and it should show you the problem. In my case I got some issue related to the SUID sandbox.
1
The SUID sandbox helper binary was found, but is not configured correctly. Rather than run without sandboxing I'm aborting now.
The quick easy fix seems to be changing the permission of /tmp/.mount_OpentrXXXX to 4755 but that won’t work. Indeed, each time we restart the app the, it creates a new sandbox with a new XXXX so we cannot change the permission before starting the app and the app crashes as the permission are too low. And obviously changing the permission of the parent /tmp/ folder isn’t an option (really don’t do that!)
Digging a bit on github and searching for the same issue with other chromium based app (hey electron), I found this comment: https://github.com/electron/electron/issues/42510#issuecomment-2171583086 The solution is to lift the restrictions that Ubuntu 24.04 implements in the AppImages.
1
sudo sysctl -w kernel.apparmor_restrict_unprivileged_userns=0
and now we can run our .appImage with no issue.
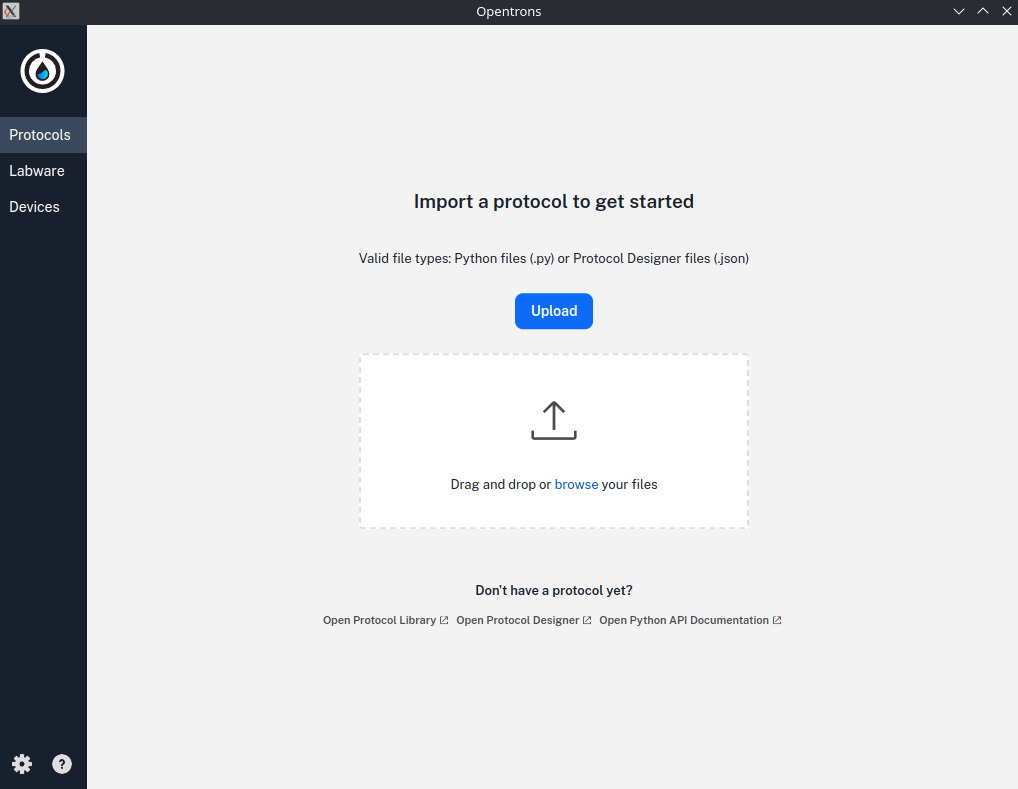
Figure 1: The Opentron App Welcome screen
Yay it works! We simply need a .. protocol. Well I don’t have that (yet). So let’s move to the python sdk.
Creating a protocol with the python sdk
This part will be heavly based on opentron’s tutorial as I will be following it as I write.
I let you choose how you setup your python environment, as a matter of fact I went for a python venv with version 3.10 as stated on Opentron’s website.
Then you can install opentrons sdk using:
1
pip install opentrons
Create a protocol file
According to Opentrons, each protocol file should start with a specific import.
1
from opentrons import protocol_api
They say it isn’t necessary but is a good practice so let’s follow that.
Metadata
Next in the same file we have to specify the metadata in a dictionary format. The apiLevel is needed but other keys such as the protocolName, description and author can also be set. Obviously we will set those as well. Here’s my metadata:
1
2
3
4
5
6
7
8
9
10
metadata = {
 "apiLevel": "2.22", # first api version to support liquid labeling
    "protocolName": "Serial Dilution Tutorial",
    "description": """This protocol is the outcome of following the
                   Python Protocol API Tutorial located at
                   https://docs.opentrons.com/v2/tutorial.html. It takes a
                   solution and progressively dilutes it by transferring it
                   stepwise across a plate.""",
    "author": "Xavier"
}
Requirements
The requirements block can be set before or after the metadata. It might or might not be needed based on the robot model and API version.
Flex the
requirementsblock is always required, and we have to put the API version tehre instead of in themetadatasection.OT-2 the
requirementsblock is optional but recommanded. If we use it we should put the api version in it.
So to summarize, we should do it no matter what and put the api version in it as well. Having neither Flex nor OT-2 I will pich the most strict (Flex) and adapt both the metadata and requirements.
1
2
3
4
5
6
7
8
9
10
11
metadata = {
    "protocolName": "Serial Dilution Tutorial",
    "description": """This protocol is the outcome of following the
                Python Protocol API Tutorial located at
                https://docs.opentrons.com/v2/tutorial.html. It takes a
                solution and progressively dilutes it by transferring it
                stepwise across a plate.""",
    "author": "Xavier"
}

requirements = {"robotType": "Flex", "apiLevel": "2.22"}
The run() function
To actually instruct the device we have to use the python run function. It takes a single argument; the protocol context.
1
2

def run(protocol: protocol_api.ProtocolConext):
Labware
For our serial dillution we will need a few hardware:
a tip rack of 200uL
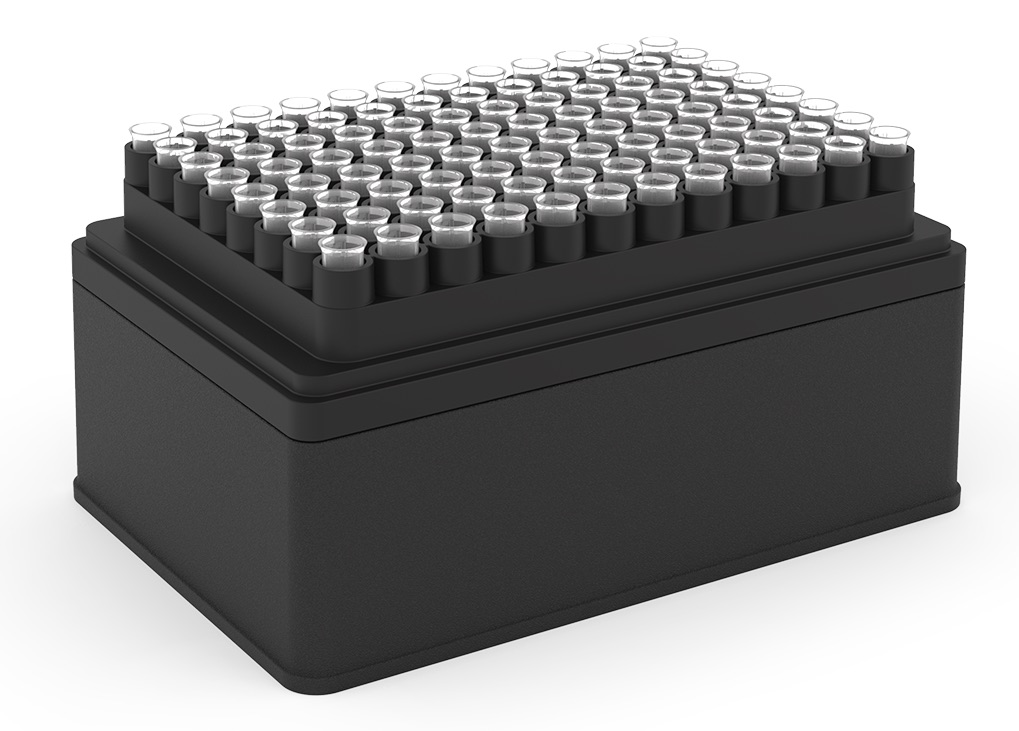
a reservoir
a 96-well plate
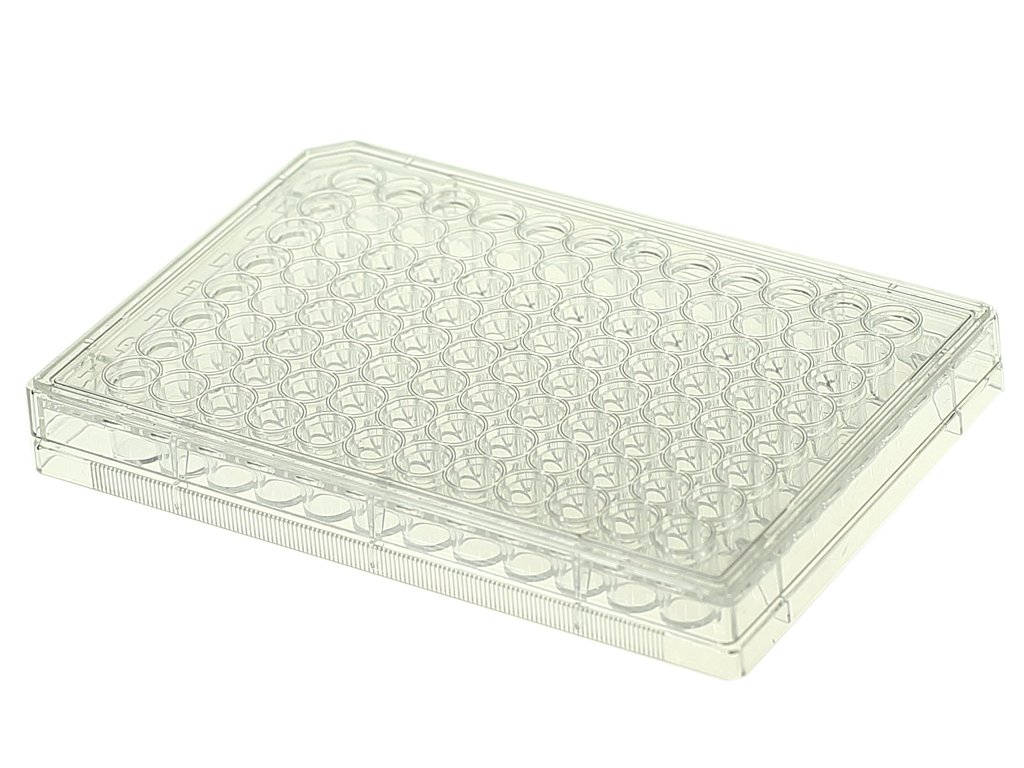
We can load the labware using the load_labware() method of the protocol context. It takes two arguments: the standard labware name as defined in their library and the position where the labware is placed on the robot’s deck.
As an example here’s how we would load our labware in slots D1, D2 and D3 of a Flex.
1
2
3
4
5
6
7

def run(protocol: protocol_api):

    tips = protocol.load_labware("opentrons_flex_96_tiprack_200ul","D1")
    reservoir = protocol.load_labware("nest_12_reservoir_15ml", "D2")
    plate = protocol.load_labware("nest_96_wellplate_200ul_flat", "D3")
Opentrons assigns letter to the row and numbers to the columns (starting from the top left). Thus the previous run expect the labware in that configuration:
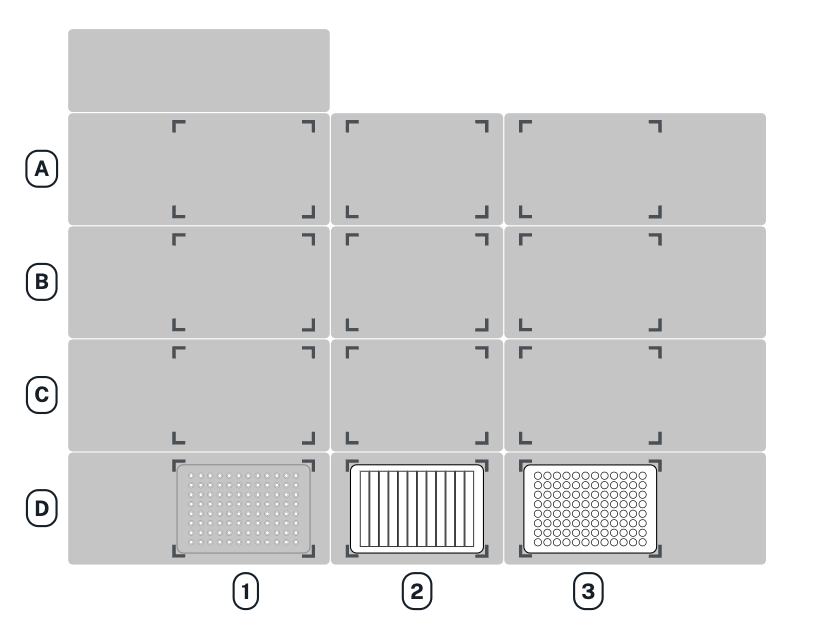
Figure 2: The initial labware setup for our run
Labelling liquids
It looks like labelling liquids isn’t necessary for python protocol but I tend to prefer having everything labeled so let’s dig into that.
In this exercise we basically used some clear water and dyed water (blue). Thus we can define our liquids.
We use the method define_liquid of protocol.
1
2
3
4
5
6
7
8
9
10
11
12

SolventWater = protocol.define_liquid(
    name="water",
    description="Non colored water for demo",
    display_color="#FFFFFF",
)
blueWater = protocol.define_liquid(
    name="Blue water",
    description="Blue colored water for demo",
    display_color="#0000FF",
)
As you can see, we can give a name, a description and a display color for the simulation. I opted for a white color for the non dyed water and a blue color for the dyed one.
Next we can load the reservoir with our water. According to the tutorial sneak peek, we the diluent in column 1 and the solution in column 2. As we are working with water, and a 15 mL reservoir, we can load ~14 mL at each position.
1
2
3
4
5
6
7
8
9
10
11

reservoir.load_liquid(
    wells = ["A1"],
    volume = 14000, # we expect uL
    liquid = SolventWater
)
reservoir.load_liquid(
    wells = ["A2"],
    volume = 14000, # we expect uL
    liquid = BlueWater
)
Here we basically said:
” At the position A1 of the reservoir, one should put 14 mL of water.” “ At the position A2 of the reservoir, one should put 14 mL of dyed water.”
It is just a label! We didn’t manipulates any liquids!
Trash Bin
Next we have to define the trash bin (as we will discard some tips). For the flex, we can put the trash bin wherever we want. We can load a trash bin using the load_trash_bin() method with a single argument being its location.
1
trash = protocol.load_trash_bin("A3")
Pipettes
Now we can specify what pipette to use with this protocol. To do so we use the Load_instrument() method. It takes two arguments, the name of the pipette and the mount it is installed in. The tip racks should be specified when performing transfers. We have to follow the standard pipette name. In our case, as we will make dillutions, work with 200 uL wells and the flex. We go or the Flex 1-Channel Pipette 5-1000 and we assume it is on the left position.
1
left_pipette = protocol.load_instrument("flex_1channel_1000", "left", tip_racks=[tips])
defining tip_racks was optional but now that it is set, tips is assigned to the left_pipette meaning that the robot will use it when commanded to pick up tips.
Commands
Finally, everything is in place, so we can start giving pipetting commands. To break down a serial dillution we have three main phases.
- Measure out equal amounts of diluent from the reservoir to every well on the plate.
- Measure out equal amount of solution from the reservoir into wells in the first column of the plate
- Move a portion of the combined liquid from column 1 to 2, then from 2 to 3 and so on al the way to column 12.
using the transfer() method, each of these phase can be accomplished with a single line of code.
We can start with the first phase, the diluent. transfer() can handle this and we can spread it to all the wells.
1
left_pipette.transfer(100, reservoir["A1"], plate.wells())
Here we are putting 100 uL of whatever liquid is in the first position of the reservoir to each well of the plate.
Now we can move to the second phase and third phase. Using a for loop it is in fact really easy. We know that the 96 wells plate is 8*12. So we have 8 columns.
1
2
3
4
5
6
7
8
9
10
11
12
13
14
15
16

for i in range(8):
    row = plate.rows()[i] # called the i-th row
    # 2nd phase
    left_pipette.transfer(100, # take 100 uL
                          reservoir['A2'], # from the second position of reservoir
                          row[0], # put them in the first well of the row
                          mix_after=(3, 50) # mix 3 times with 50 uL after dispensing
                          )

    # 3rd phase
    left_pipette.transfer(100, # take 100 uL
                          row[:11], # from all the wells but the last
                          row[1:], # put to all the wells but the first
                          mix_after=(3, 50) # mix 3 times with 50 uL after dispensing
                          )
The transfer method is really handy. It accept lists as source and destination arguments.
In the 3rd phase above, we basically said. “Move a portion of the combined liquid from column 1 to 2, then from 2 to 3 and so on al the way to column 12.”
And that’s it. We can now save our script as a .py file and test the protocol.
Testing our protocol
Opentrons also provide a nice “text result” simulation tool. by calling:
1
2
3

opentrons_simulate <your_protocol>.py
You can simulate the full protocol and see what it does. That would output a huge number of lines as tere’s a lot of manipulation. If like me you want to inspect the results, you can redirect the output to a file.
1
2
3

opentrons_simulate <your_protocol>.py >> simulation.txt
Conclusion and outlooks
And that’s it! Now the only thing nice would be to see an actual digital twin of the device move haha.
You can also download the final code here.